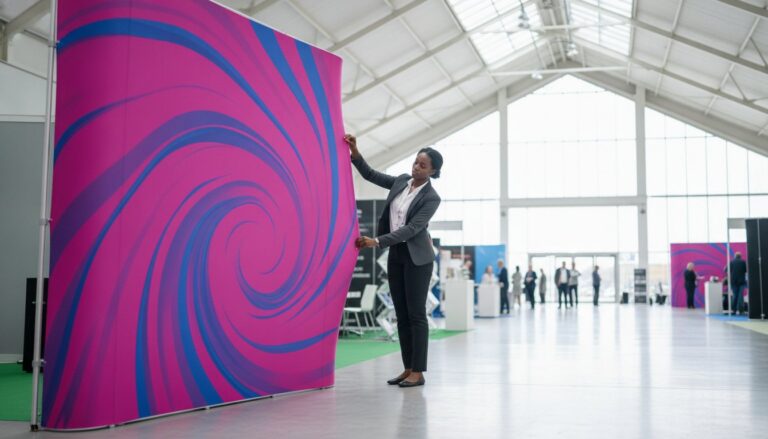
How to Transport Exhibition Graphics Safely: The Professional Guide
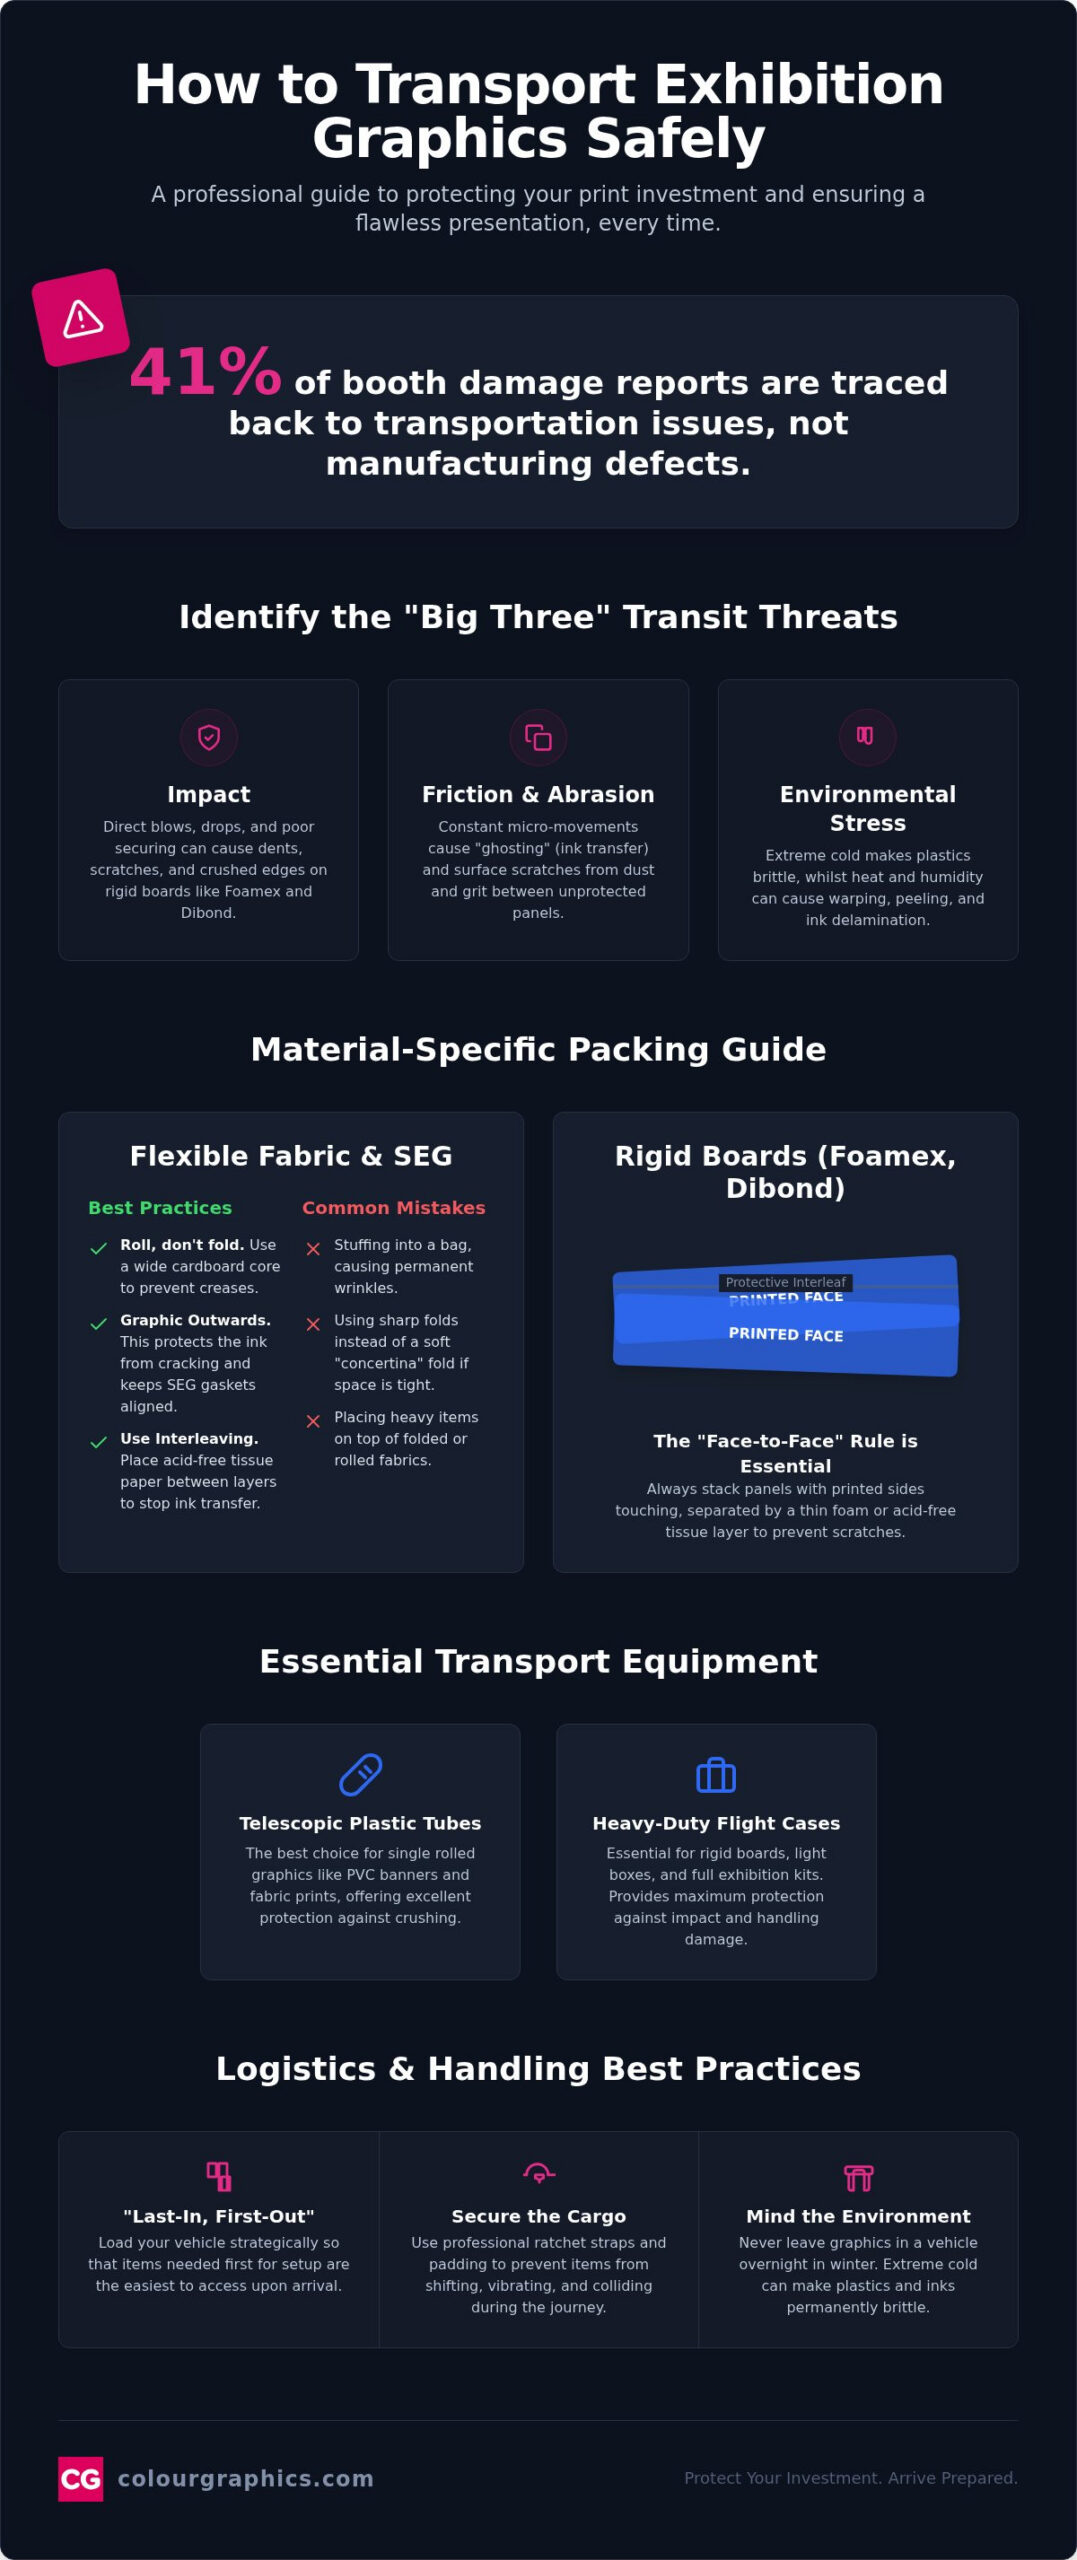
Did you know that 41% of booth damage reports are traced back to transportation issues rather than manufacturing defects? It’s a staggering figure that highlights the hidden risks of the logistics phase. You’ve invested in high-impact Silicone Edge Graphics or Dibond printing to make a professional statement, yet the journey to the venue often feels like a gamble. We understand the frustration of unboxing a fabric display only to find stubborn creases, or worse, discovering that a rigid Foamex board has suffered a deep scratch. Mastering how to transport exhibition graphics safely is the only way to protect your investment and your reputation.
You deserve the peace of mind that comes with a reliable, repeatable packing system. This professional guide will provide the expertise you need to ensure your displays arrive in pristine condition for every show. We’ll break down the specialised protection requirements for various materials, from the correct way to roll PVC banners to the structural support needed for fabric light boxes. By the end of this article, you’ll have a masterclass in transit protection that eliminates missing components and ensures your brand always looks its best. We’re here to help you navigate the complexities of logistics with confidence and precision.
Key Takeaways
- Identify the “Big Three” transit threats: impact, friction, and environmental stress, to protect your rigid boards from ink delamination and surface damage.
- Learn the precise methods for rolling and folding fabric displays to discover how to transport exhibition graphics safely without risking permanent creasing.
- Compare professional transport equipment, from telescopic plastic tubes to heavy-duty flight cases, to find the most reliable protection for your specific display types.
- Optimise your logistics with a “last-in, first-out” loading strategy and professional securing techniques that prevent edge crushing during the journey.
- Discover how choosing high-performance substrates and specialised Silicone Edge Graphics (SEG) provides a more resilient foundation for frequent touring.
Understanding the Risks: Why Exhibition Graphics Fail in Transit
Most exhibitors focus their energy on the design and production stages, yet the journey to the hall is where the real risk lies. Understanding how to transport exhibition graphics safely starts with identifying the “Big Three” threats: impact, friction, and environmental stress. While a hard shell protects against a direct blow, it does little to stop the subtle internal forces that ruin a display before it’s even unpacked. We define true transit safety as a strategic combination of robust outer shielding and precise internal stabilisation. Without both, your high-quality prints are at the mercy of every pothole and sharp turn.
Vibration is a silent killer for rigid media. When a van travels at speed, high-frequency oscillations can cause ink delamination on boards like Foamex or Dibond. This isn’t just about the board moving; it’s about the microscopic bond between the ink and the substrate being shaken apart. The financial sting of transit damage goes far beyond the initial cost of the material. Last-minute reprints often incur heavy rush fees and premium shipping charges. Worse still, arriving with a damaged display undermines your brand’s professional authority the moment visitors step onto the stand. Successful trade show logistics require a proactive approach to material behaviour under stress.
The Hidden Danger of Friction
When graphics are stacked without protection, they don’t just sit still. They rub. This constant micro-movement causes “ghosting”, where ink from one panel transfers to the back or face of another. Protective interleaving, such as acid-free tissue or thin foam sheets, is a non-negotiable requirement for stacked prints. Additionally, static electricity often builds up during handling. This attracts abrasive dust and grit that act like sandpaper, scratching delicate surfaces as the panels shift during the journey. To mitigate these risks, it is vital to use high-quality substrates; providers like קמפוס לדפוס דיגיטלי specialise in digital prints that offer the surface resilience needed for safe transit.
Environmental Stress Factors
Your graphics are sensitive to the atmosphere around them. Temperature fluctuations in a parked van can cause adhesive vinyl to expand or contract, leading to unsightly peeling or bubbling. Moisture is equally destructive, especially for untreated paper-based media which can warp or lose structural integrity in high humidity. You should never leave graphics in a vehicle overnight during winter. Extreme cold makes many plastics and inks brittle, which means they are likely to snap or crack the moment you attempt to install them in a warm exhibition hall.
Material-Specific Packing: From SEG to Rigid Boards
Packing for a show isn’t just about fitting items into a van; it’s about understanding the physical limits of each substrate. When you’re looking at how to transport exhibition graphics safely, you must treat flexible fabrics and rigid boards as two entirely different logistical challenges. Fabric banners are often touted as the ultimate portable solution, but they aren’t immune to damage. Whilst many assume they can simply be stuffed into a bag, improper folding leads to permanent creasing that even a high-powered steamer won’t fix. Rolling onto a wide cardboard core is always the superior method for maintaining a smooth finish.
Handling Silicone Edge Graphics (SEG)
SEG requires a higher level of precision because the silicone gasket is the lifeblood of the display. If the gasket stretches or tears, the graphic won’t fit the frame correctly. We recommend rolling SEG with the graphic facing outwards. This tension prevents the ink from cracking and keeps the gasket aligned. For delicate dye-sublimation prints, always use acid-free tissue paper as an interleaf to prevent ink transfer. This level of collections care during travel ensures that your high-impact visuals remain as vibrant as the day they were printed. If you must fold for space reasons, use a soft “concertina” fold rather than sharp creases, and never place heavy items on top.
Securing Rigid Media: Foamex and Dibond
Rigid boards present a different set of risks, primarily related to impact and surface abrasion. When preparing foamex board printing for transit, the “face-to-face” rule is essential. Always stack panels so the printed sides touch each other, with a protective layer between them. This prevents the rough back of one board from scratching the finished surface of another. Corner dings are the most common cause of expensive reprints, so investing in plastic or heavy-duty cardboard edge protectors is a professional necessity for every journey.
Once stacked, use pallet wrap to bind the boards into a single, non-shifting block. This eliminates the internal friction that causes surface wear during transit. Be cautious when using ratchet straps; over-tightening on soft-core boards like Foamex or Correx® will crush the edges and leave permanent indentations. If you start with premium print solutions, the inherent durability of the substrate provides an extra layer of security, but your packing method remains the final line of defence against the rigours of the road.
Essential Transport Equipment: Cases, Tubes, and Crates
Choosing the right outer container is the final step in mastering how to transport exhibition graphics safely. While your internal packing prevents friction, your external housing must withstand the rigours of the UK courier network and the chaos of the loading bay. The choice often comes down to a balance between budget and the frequency of your events. For one-off shows, heavy-duty cardboard cores might suffice, but for anyone touring the circuit, telescopic plastic tubes and rigid drums are the professional standard. These tools provide a consistent, repeatable system that protects your high-impact visuals from external punctures and crushing forces. To explore the standard of protection required for such high-value assets, you can learn more about OEM Materials & Supplies and their range of industrial-grade protective solutions.
Graphic drums are particularly effective for protecting banner stands. They provide a hard-shell barrier that prevents the internal spring mechanism from being knocked out of alignment during transit. When choosing any case, size is critical. A case that is too large allows the contents to slide back and forth, creating internal impact damage. Always aim for a snug fit, using foam offcuts to fill any voids and stop movement. This precision ensures that your hardware and graphics arrive ready for immediate assembly.
Flexible media requires a prioritisation of diameter to prevent surface damage. We recommend a minimum of a 100mm diameter tube for most PVC Banners. Using a narrower tube forces the material into a tight curl, which can lead to “memory” issues where the banner refuses to hang flat once installed. Don’t rely on simple friction to keep your end caps in place. In the heat of a transport van, plastic expands and caps can pop off. Secure them with heavy-duty tape or locking pins to ensure your graphics don’t slide out mid-transit. Clear, bright labelling on the outside of the tube is also essential for quick identification amongst the hundreds of similar cases in a busy venue.
Professional Flight Cases
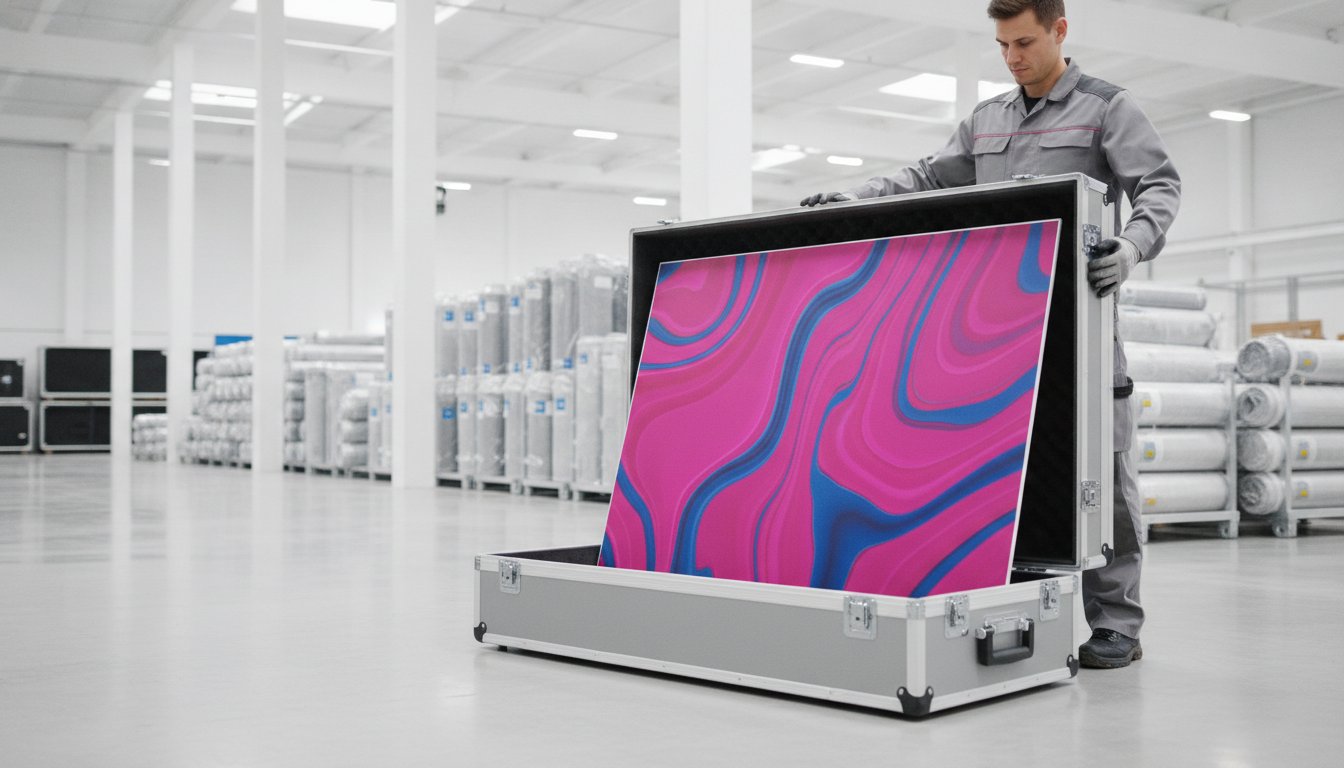
For high-frequency exhibitors, custom-built flight cases made from plywood and aluminium are a wise investment. These aren’t just boxes; they’re specialised transport solutions designed for longevity and high-performance protection. High-quality cases feature custom foam lining and inserts that hold SEG extrusions and lighting components securely in place, preventing metal-on-metal scratching. View wheels and recessed handles as safety features rather than mere conveniences. They reduce the risk of staff dropping heavy items and prevent the back injuries that often occur during the frantic setup phase of a show.
Logistics and Handling: Best Practices for the Journey
Mastering how to transport exhibition graphics safely requires more than just high-quality crates; it demands a tactical approach to the vehicle itself. The logistics phase is where many exhibitors lose focus, yet it is the period of highest risk. We recommend a “Last-In, First-Out” (LIFO) loading logic. If your graphics are the first components required for the stand build, they must be the final items loaded into the van. This prevents you from having to move heavy flight cases or extrusions over your delicate prints just to reach the tools you need. Proper weight distribution is equally vital. Ensure heavy hardware is stored low and over the axles to prevent the vehicle from swaying, which can cause internal cargo to shift violently.
Environmental factors are the most overlooked threat during the journey. A van parked in a service station becomes an oven in summer and a refrigerator in winter. High heat can soften the adhesives on standard adhesive vinyl, leading to edge curling or bubbling before you even reach the hall. Conversely, extreme cold makes inks and substrates brittle. If you are moving sensitive materials, aim for a direct journey to minimise the time graphics spend in an uncontrolled climate. If you require professional large format printing that is built to withstand these stresses, choosing the right partner at the production stage is your first line of defence.
Loading and Securing the Vehicle
Graphics should always be stored vertically against the van walls, never flat-stacked under the weight of other equipment. Flat-stacking often leads to bowing or snapped corners on rigid media. Use padded load-securing straps to hold items in place, but be careful. Placing a ratchet strap directly over the edge of a Foamex board will crush the substrate. Always use a spreader board or a piece of heavy-duty cardboard under the strap to distribute the pressure. Ensure the van floor is swept clean before loading; a single piece of grit under a sliding case can ruin a finished surface in seconds.
Arrival and Unloading at the Venue
UK exhibition centres like the NEC or ExCeL operate on strict “Loading Bay Protocols” with narrow time slots. Arriving organised is the only way to avoid stress. Upon arrival, inspect every case immediately. If a courier has damaged a crate, you must document it before the driver leaves to support any future insurance claims. For large format rigid boards, always enforce a “Two-Person Lift” rule. This isn’t just for health and safety. It prevents the board from flexing or “fluttering” in the wind, which can cause permanent structural creases or surface cracking in Dibond and acrylic panels. Organise your storage crates in a designated “dead-zone” whilst the stand is being built to keep the work area clear and safe.
Finally, review your transit insurance before you set off. Most standard business policies cover total loss or theft but frequently exclude “damage due to insufficient packaging”. This means if your graphics are scratched because you failed to use protective interleaving, you will likely be responsible for the reprint costs. Professional logistics is about eliminating these variables through meticulous preparation and expert handling.
Premium Print Solutions: Graphics Built for the Demands of Touring
The most advanced packing techniques in the world cannot compensate for a low-grade print. When you consider how to transport exhibition graphics safely, the conversation must begin at the production stage. High-performance graphics aren’t just about visual impact; they’re engineered to withstand the physical stresses of repeated loading, temperature shifts, and vibration. At Colour Graphics, we focus on the intersection of aesthetics and durability, ensuring that your investment survives the transition from the van to the venue floor without losing its professional edge. A display that looks great in the studio but fails in the field is a liability you don’t need.
Why Quality Prints Survive the Road
Budget inks often sit on the surface of a substrate, making them prone to flaking or “edge shatter” when a board is bumped or flexed. In contrast, professional UV-cured or dye-sublimation prints create a much more resilient bond that flexes with the material. This is particularly important for rigid media like Foamex and Dibond, where a laminated finish acts as a sacrificial layer against surface scuffs. Lamination doesn’t just add a gloss or matt effect; it provides a structural barrier that prevents friction-based ink transfer. Choosing the right material for a multi-show tour requires technical insight into how different plastics and fabrics behave under tension. We invite you to explore the Colour Graphics homepage to see how our 40 years of UK-based manufacturing experience can support your next campaign.
Choosing Your Next Touring Display
For exhibitors who travel frequently, Silicone Edge Graphics (SEG) remain the gold standard for touring. The fabric is inherently more forgiving than rigid PVC, and when printed using high-quality dye-sublimation, it can be folded or rolled repeatedly without the ink cracking or delaminating. Our proprietary extrusions are designed to protect the edges of the graphic whilst providing a high-impact, frameless look. If you’re working with existing transport cases, our specialists can help you order replacement graphics that are precision-cut to fit your current hardware perfectly. This ensures a snug fit within your protective cases, eliminating the internal movement that causes transit damage. Before you commit to a specific substrate for your next tour, consult with a specialist to ensure your chosen media is truly built for the road. Investing in quality from the start is the most effective way to guarantee a damage-free arrival every time.
Secure Your Brand’s Impact on the Road
Protecting your visual assets is the final, critical step in any successful marketing campaign. By matching your packing strategy to the specific vulnerabilities of your materials and investing in professional-grade transport equipment, you eliminate the risks that lead to expensive reprints. Mastering how to transport exhibition graphics safely isn’t just about avoiding scratches; it’s about ensuring your brand arrives at the venue with its professional authority intact. A damage-free arrival is the foundation of a high-performance stand.
Since 1980, we’ve provided UK-based manufacturing for displays that are built to survive the rigours of the road. Whether you require expert advice for national exhibition tours or need specialists in SEG and fabric displays, our team is here to support your success. Explore our range of durable exhibition graphics at Colour Graphics and gain the peace of mind that comes with industry-leading expertise. Your next show-stopping arrival starts with a resilient, high-quality print. Let’s make your next exhibition your most successful one yet.
Frequently Asked Questions
Can I fold my fabric exhibition graphics for transport?
Folding is possible for certain fabric displays, but it’s not always the best choice. Dye-sublimation prints on stretch polyester are resilient; however, sharp creases can become permanent if left under weight. If you must fold, use a soft concertina method and place the graphic inside a padded bag. For the highest level of protection, rolling the fabric onto a wide cardboard core remains the professional standard for avoiding unsightly wrinkles upon arrival.
What is the best way to prevent Foamex boards from snapping?
Preventing Foamex from snapping requires you to eliminate structural flex. Always store these boards vertically against a flat surface rather than laying them flat, where they might bow under their own weight. During the loading process, ensure you use edge protectors and spreader boards under any securing straps. This distributes the pressure evenly and prevents the ratchet from biting into the soft plastic core, which is a common cause of terminal structural failure.
Should I transport my graphics in a car or a van?
A dedicated van is the superior choice for anyone learning how to transport exhibition graphics safely. Most domestic cars lack the internal height to store 8ft boards vertically or the length to accommodate 3m banner tubes. Vans offer flat floors and integrated tie-down points, which are essential for stabilising flight cases. This professional setup reduces the risk of items sliding and colliding, which is the primary cause of transit-related display damage.
How do I remove creases from a fabric graphic once I arrive at the show?
Most minor wrinkles in stretch fabric displays will vanish once the graphic is tensioned into its frame. For more stubborn creases, use a professional handheld steamer on the reverse side of the material whilst it is installed. Avoid using a domestic iron, as high heat can damage the polyester fibres or cause ink migration. If you’ve packed your graphics correctly using the rolling method, you’ll find that very little post-transit maintenance is actually required.
Do I need a hard case for my roller banners?
Whilst roller banners have their own aluminium housings, a secondary hard case is a vital investment for touring. The internal spring tensioners are precision components that can be knocked out of alignment by a single sharp impact. Using a telescopic graphic drum or a padded flight case provides a crucial buffer against the rough handling common in courier networks. This extra layer ensures your hardware functions perfectly every time you pull up the graphic.
What should I do if my graphics are damaged by the courier?
Immediate documentation is your most powerful tool if a courier damages your shipment. Inspect the external crates before signing for the delivery and photograph any visible punctures or crushed corners. If the contents are compromised, notify both the transport company and your print partner immediately. Keep all original packaging, as insurance providers often reject claims if they cannot inspect the materials used to protect the goods during the journey.
Is it safe to roll PVC banners with the print facing inwards?
You should always roll PVC banners with the print facing outwards to maintain the integrity of the surface. Rolling inwards can cause the material to “tunnel” or create permanent ridges in the ink layer. Facing the print outwards keeps the surface under slight tension, which helps the banner hang perfectly flat once it’s deployed at the exhibition centre. Always use a core with at least a 100mm diameter to prevent the material from developing a permanent curl.
How do I protect the silicone edge on my SEG graphics?
Protecting the silicone gasket is essential for ensuring a perfect fit in your SEG extrusions. When rolling your Silicone Edge Graphics, ensure the gasket isn’t twisted or pinched, as this can cause the rubber to stretch or tear. We recommend interleaving the graphic with acid-free tissue paper to prevent the silicone from sticking to the printed face. This careful handling is a core part of how to transport exhibition graphics safely, preserving the tension required for a flawless display.